

Fun and easy to make, these Valentine's Day Cake Pops will put a smile on anyone's face! Make them for your family, your special someone, or just to share with neighbors and friends. Great for parties, too!
Wrap them up in individual cellophane treat bags for party treats and to share with your loved ones!

Coming at ya with an unapologetically red Valentine's Day Dessert!
Related recipe: Chocolate-Dipped Raspberry Brownies
Cake pops
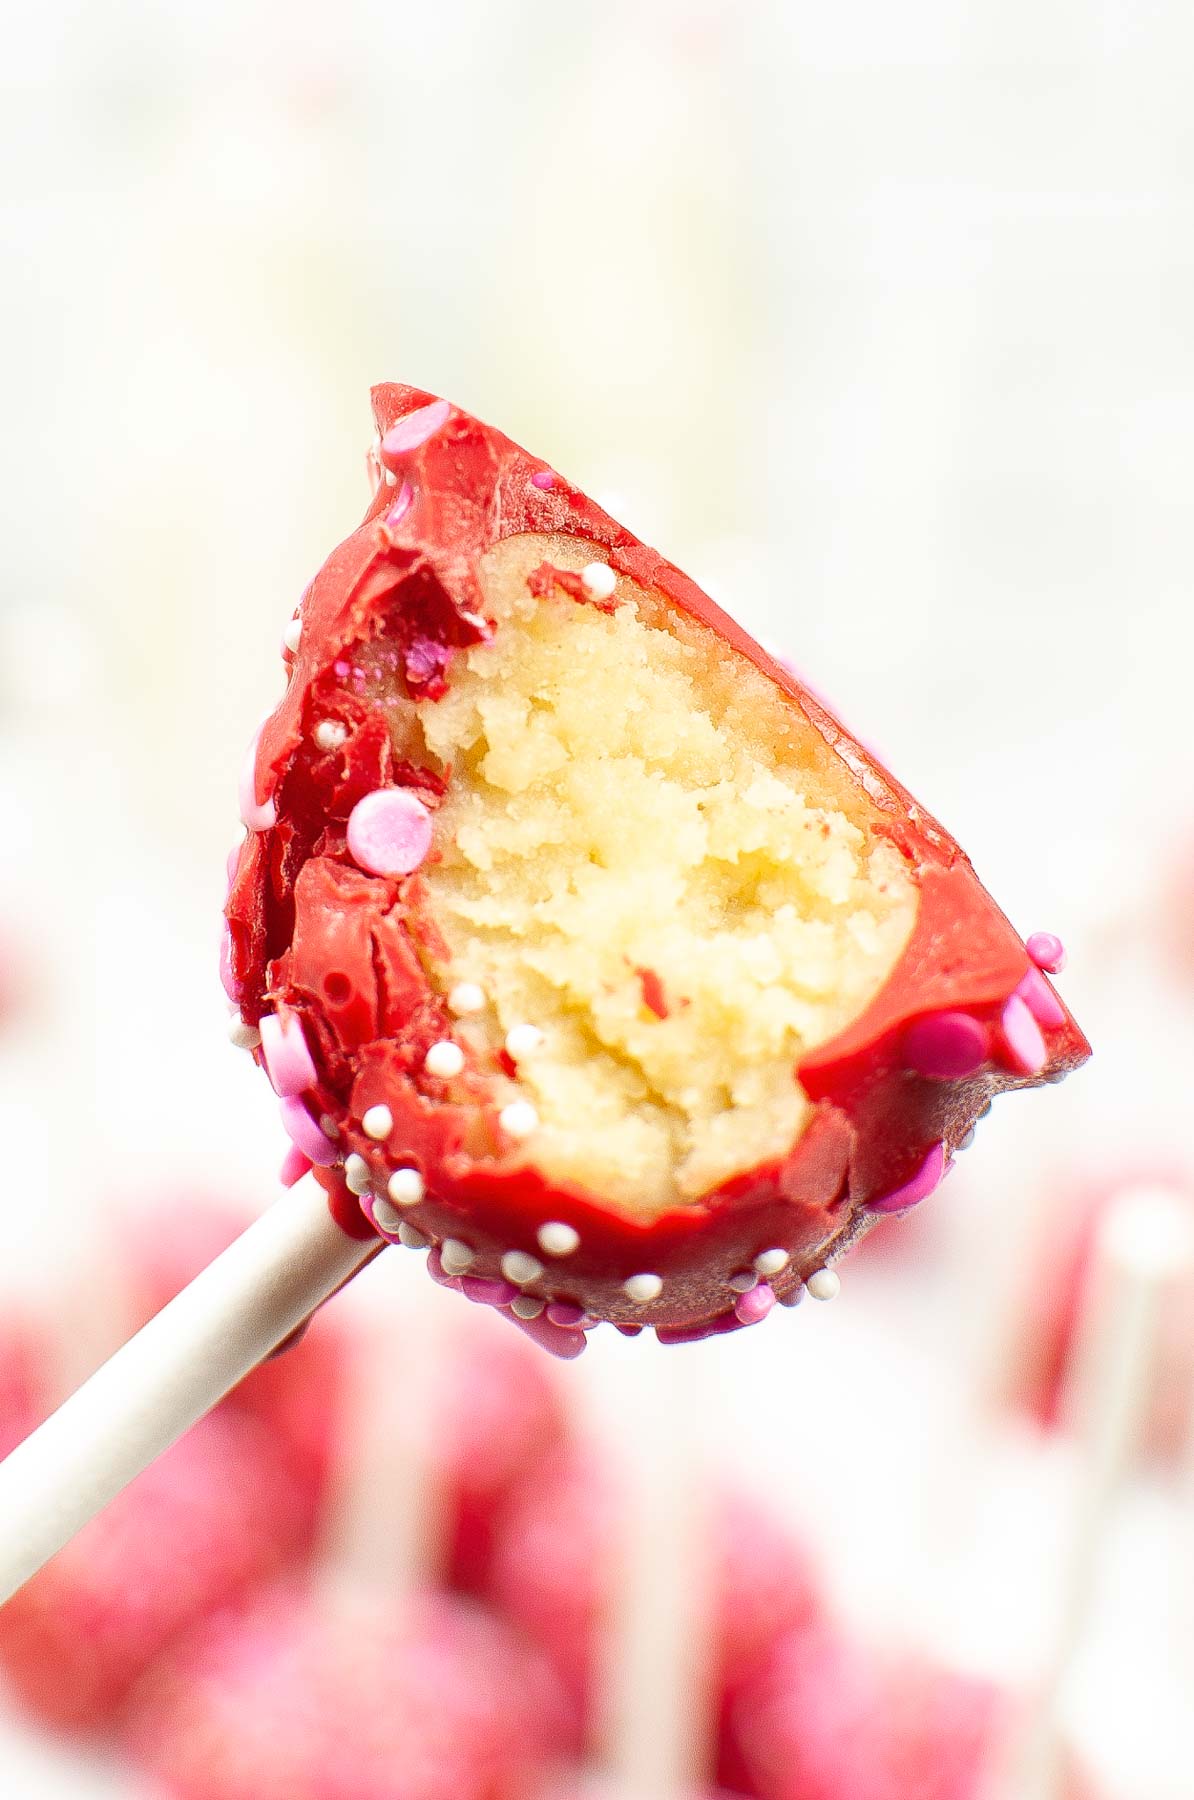
Cake pops need no explanation. Delicious yellow cake (or any cake of your choice!) combined with frosting makes an amazing chewy treat similar to edible cookie dough, but better, because, well, cake!
Roll it into bite-sized balls, stick them on a lollipop stick, and dip into melted chocolate (or candy melts, in this case!).
Pure joy on a stick.
Related recipe: Valentine's Day Hot Chocolate Bombs

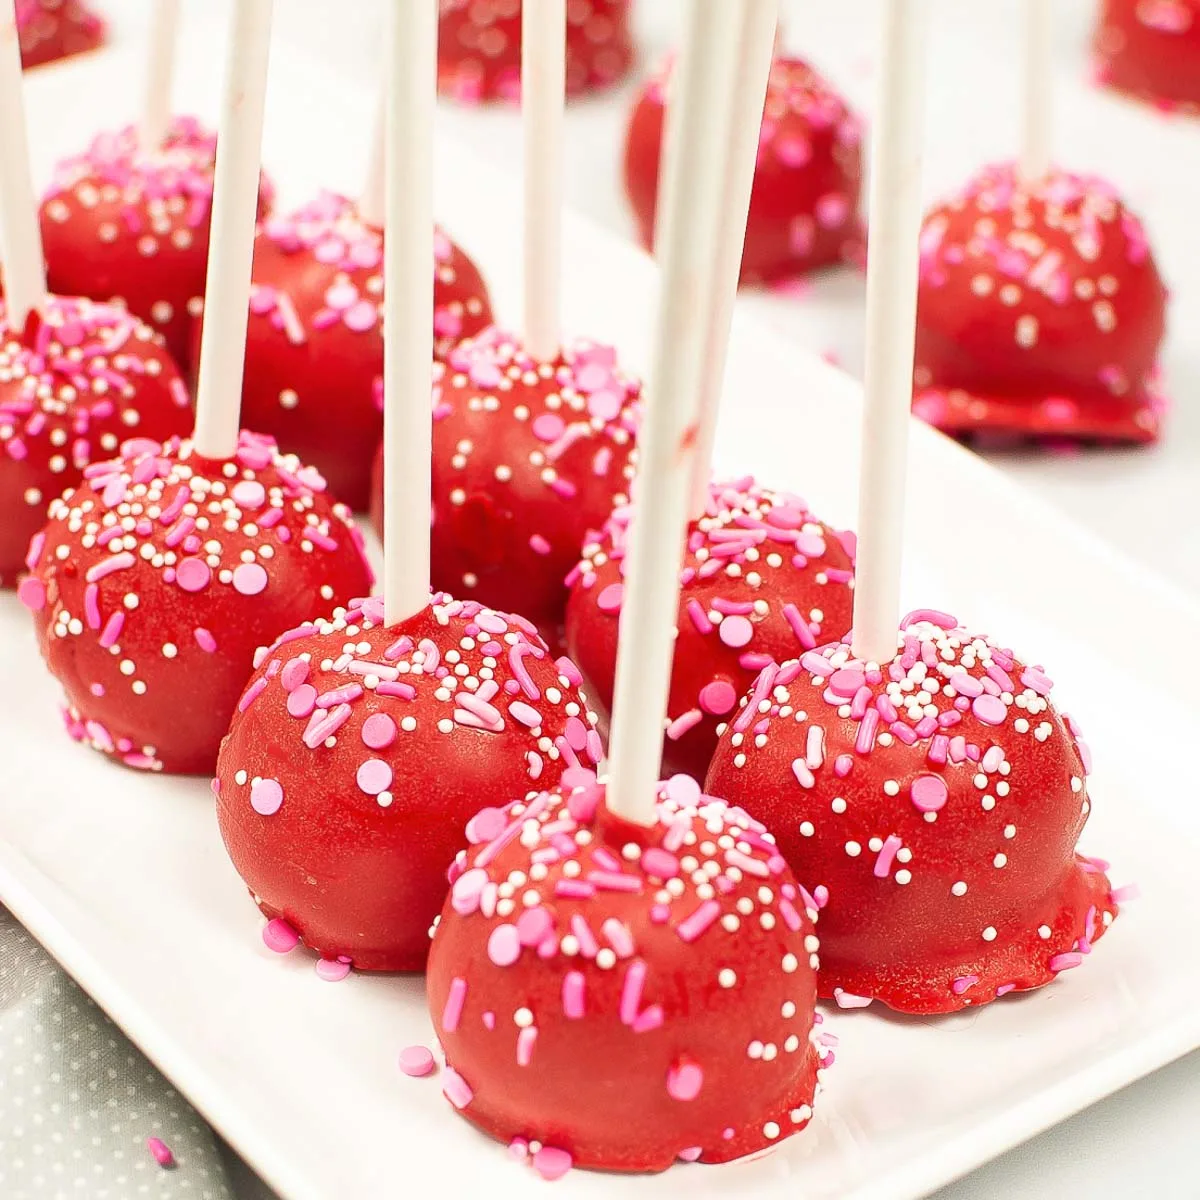
Cake pops are amazing for Valentine's Day parties, for treating your family to a lovely Valentine's Day, or anytime you want to put a smile on anyone's face.
They are great for parties because everyone can easily grab one from the dessert table. They're great for treats because you can easily pack them up in cellophane bags (how cute are these with little bows?!) and give them out as gifts to neighbors, friends, and family.
Cake pops are also an amazing way to use up leftover cake that is about to get juuust a little too dry or stale.
Ready to make these?? Here's what you need:
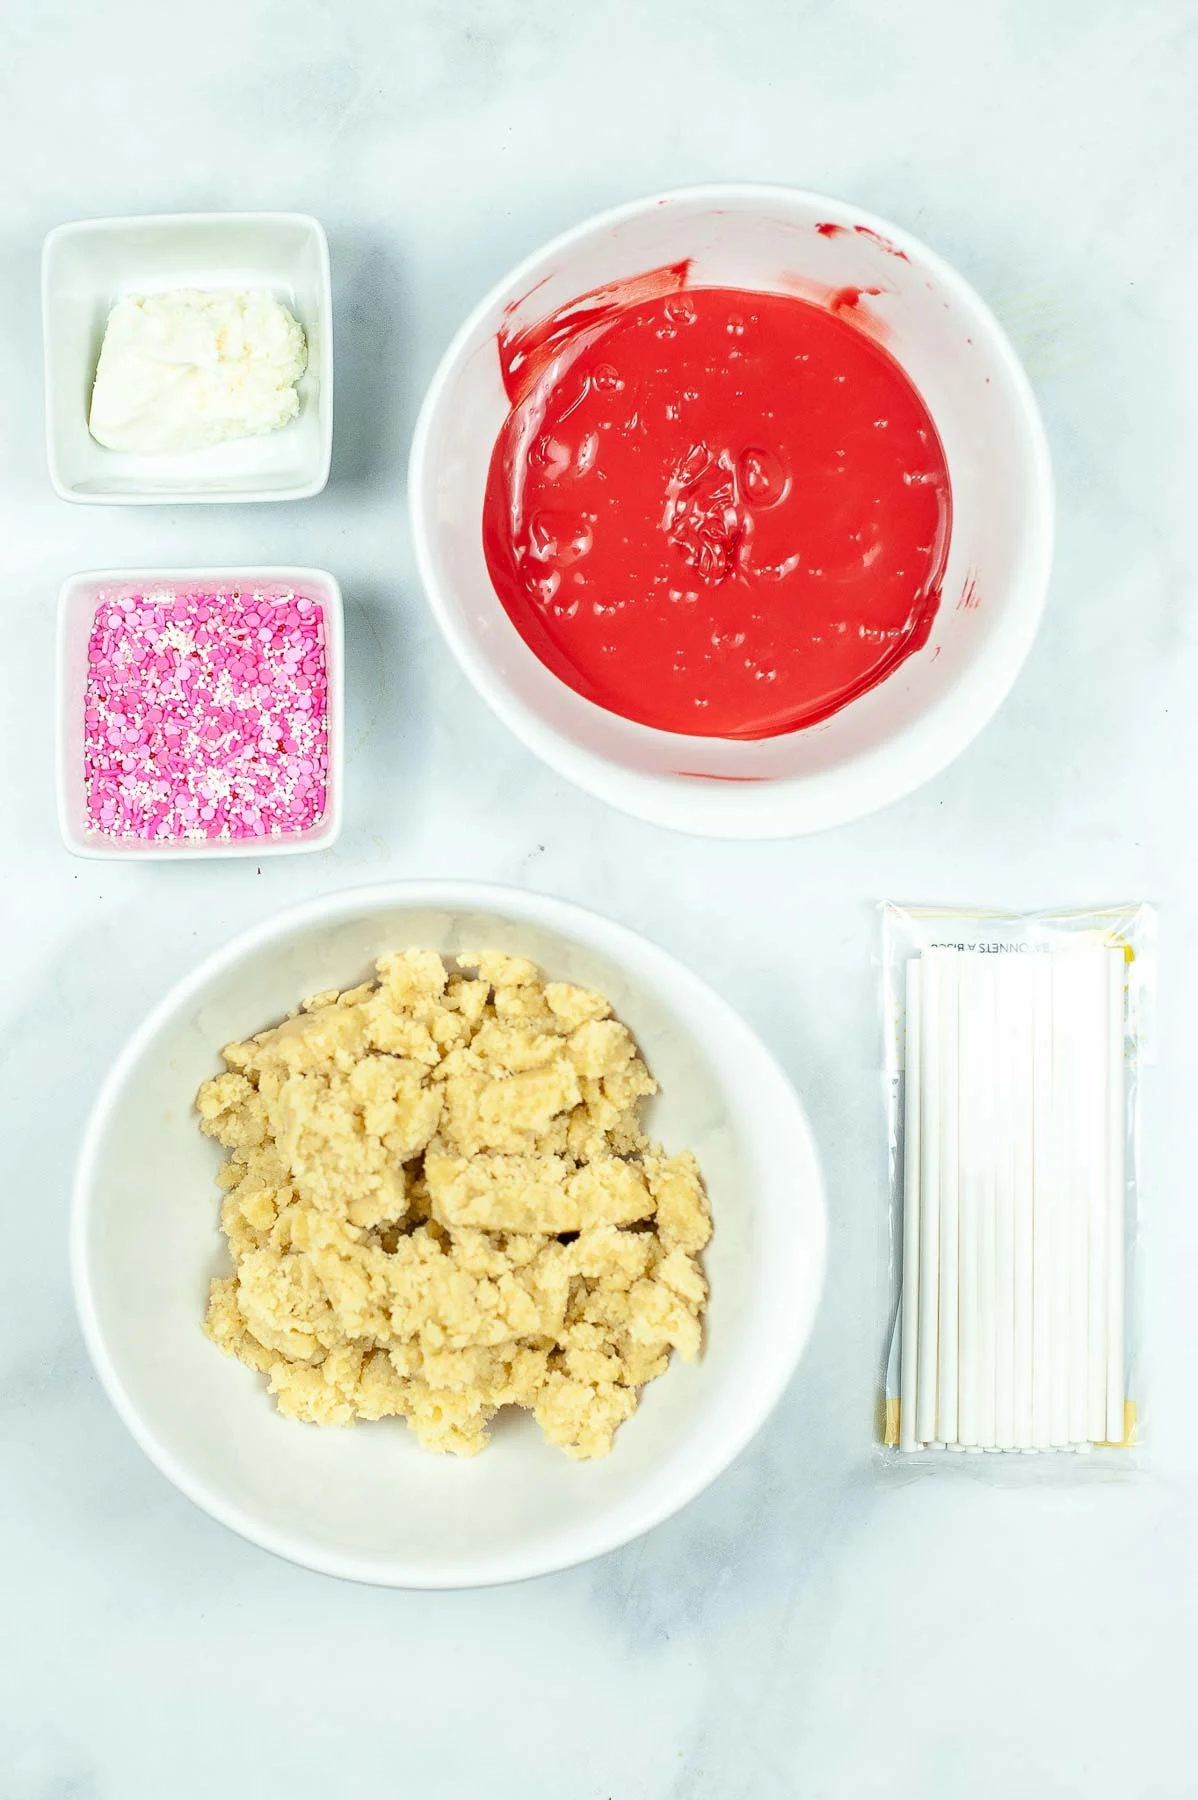
Ingredients:
→ ½ baked cake, cooled to room temperature. Go ahead and use your favorite boxed cake for this, no one gets extra points for baking a cake from scratch only to mush it up. It's important to let the cake cool, otherwise it will melt the icing and be harder to form into little balls. And also, you don't want to burn yourself!!
Also, notice how this recipe calls for half a cake?? Go ahead and enjoy the first half of the cake as-is, then switch things up with the leftovers!
→ 2 tablespoons cream cheese frosting, or your favorite frosting
→ 12 oz candy melts (I used red, but feel free to use pink, or any other colors if you're not into the whole red or pink thing)
→ 20 6-inch cake pop sticks (this set here includes the treat bags, this set here is just the cake pop sticks if you're not planning on wrapping these up individually).
→ Sprinkles! You're going to want to decorate these cake pops! If you're not into sprinkles, you can use white candy melts or melted white chocolate to drizzle white chocolate across these cake pops

More gorgeous red treats for Valentine's Day: Red Velvet Pancakes
Cake pop accessories:
If you would like to serve cake pops on a fancy display stand, here are a few cute options:
- This one holds 21 cake pops, you should be able to make 21 cake pops using this recipe
- This one is rustic and cute, and holds 15 cake pops
- This one is tiered and holds 24, you might need to double the recipe because it might be hard to squeeze out 24 cake pops from half a cake
- But any nice serving platter will work!
Depending on how you choose to serve your cake pops, you might need a drying rack, such as this one. More on this below!!
Make cake pops:
Making cake pops is so much fun!
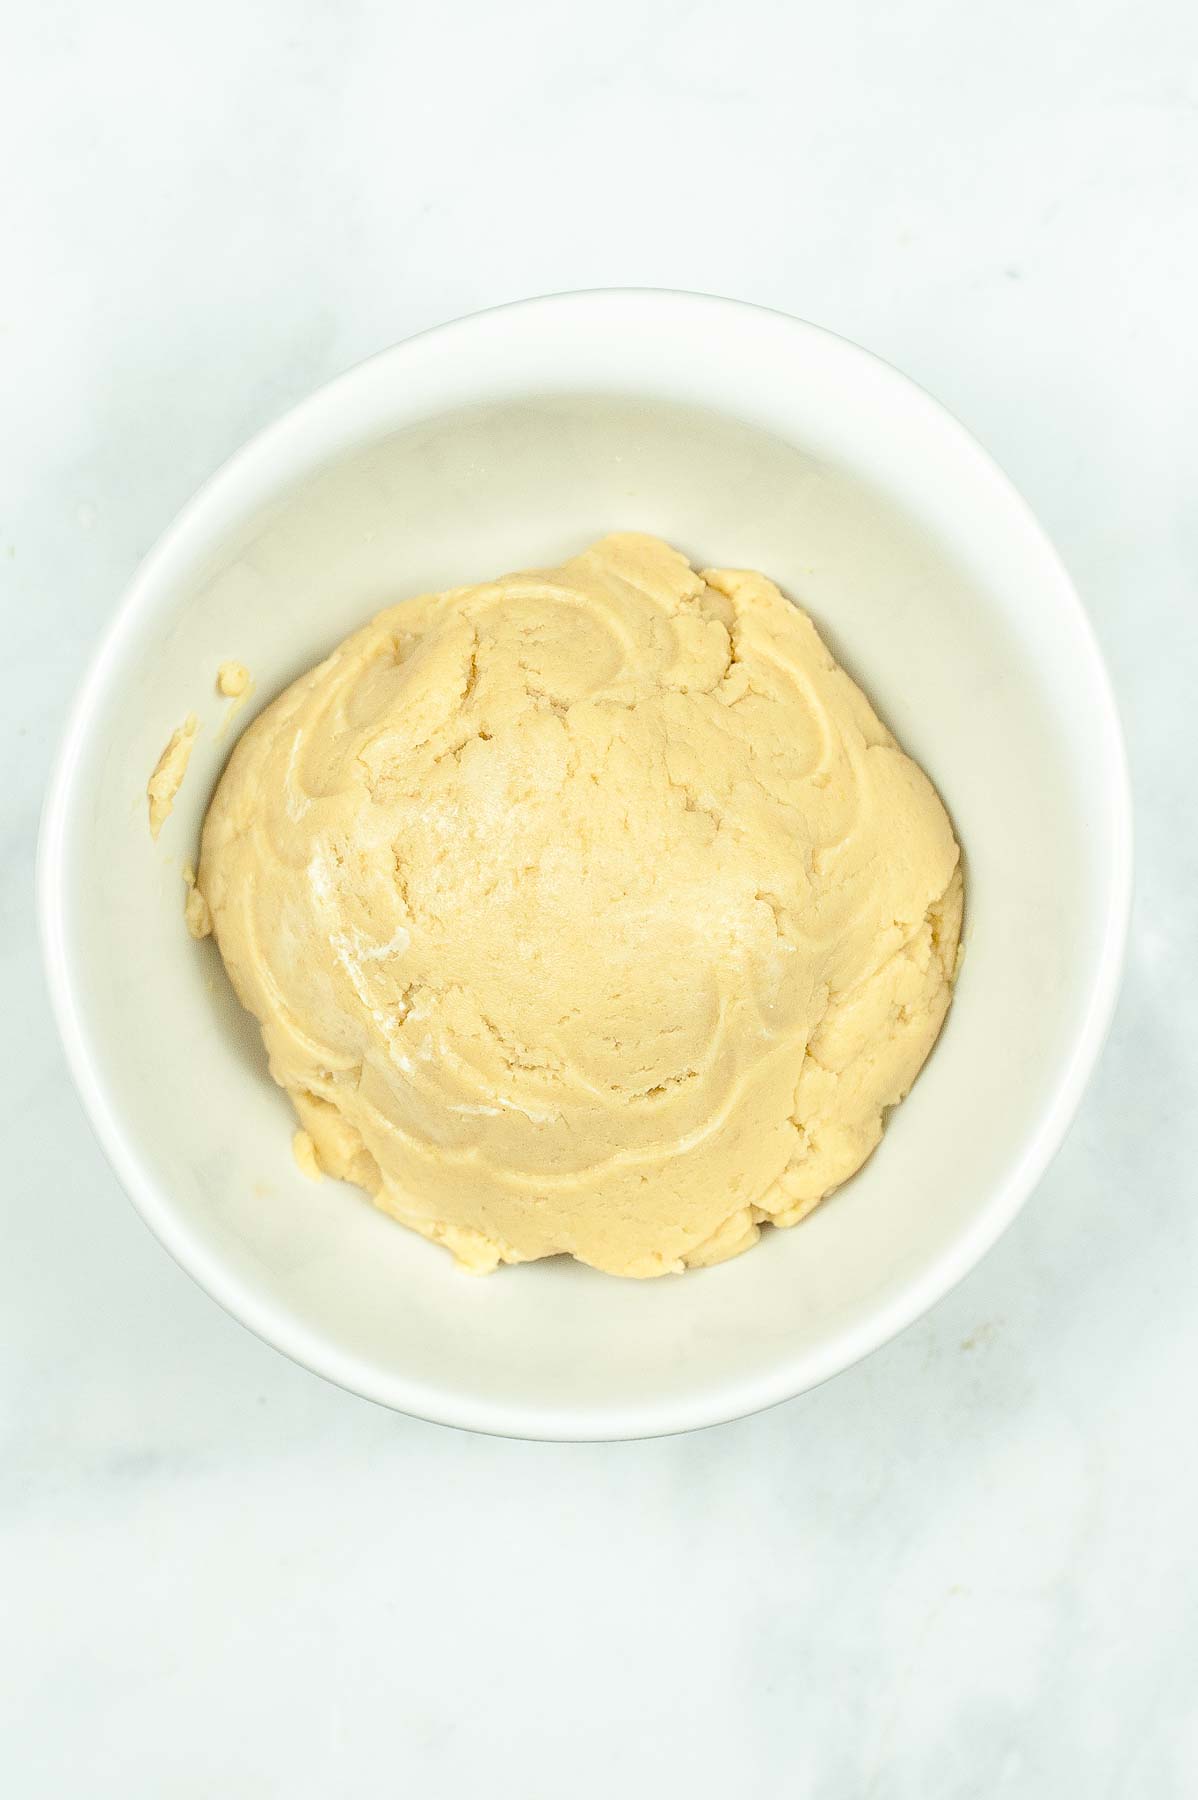
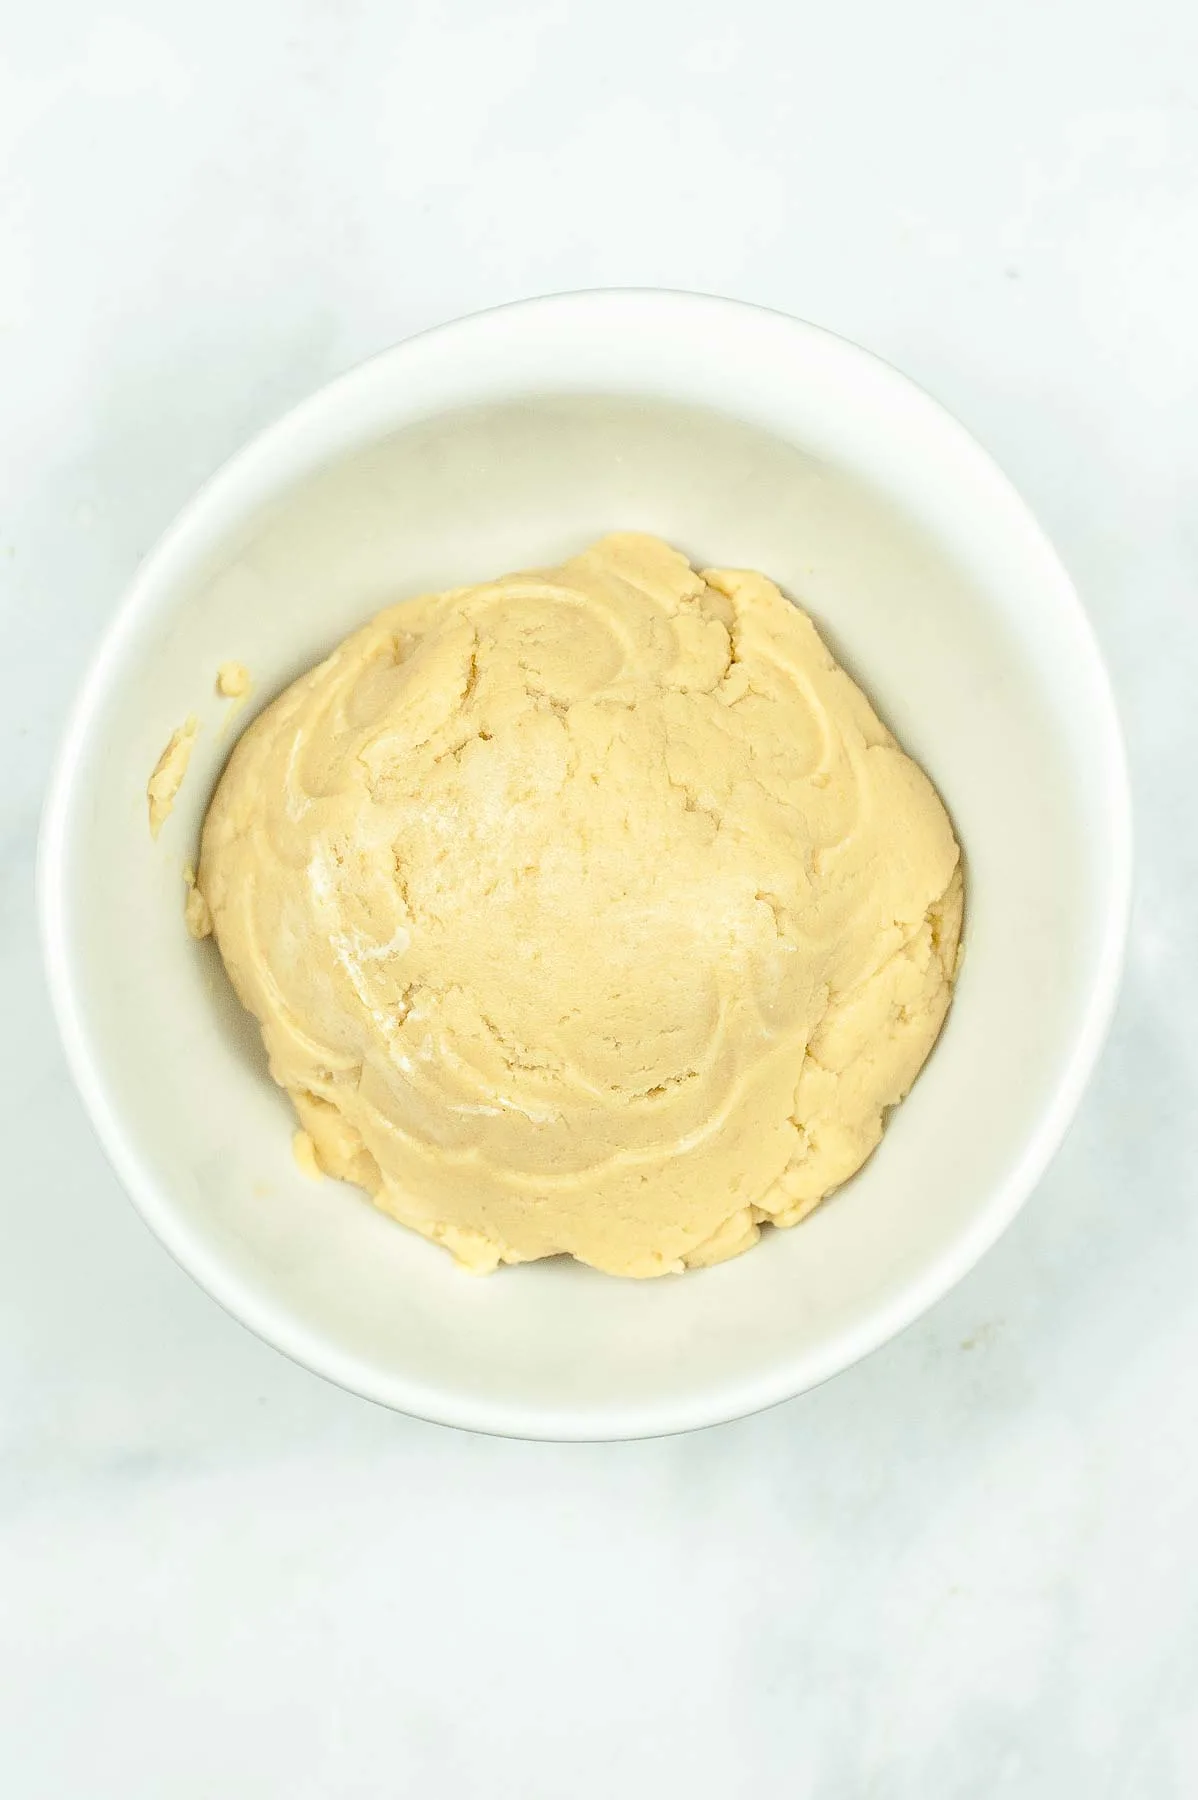
Start by crumbling up the cake in a large bowl.
Add the ream cheese frosting. Mix well with a hand mixer, a strong spoon, or a stand mixer.
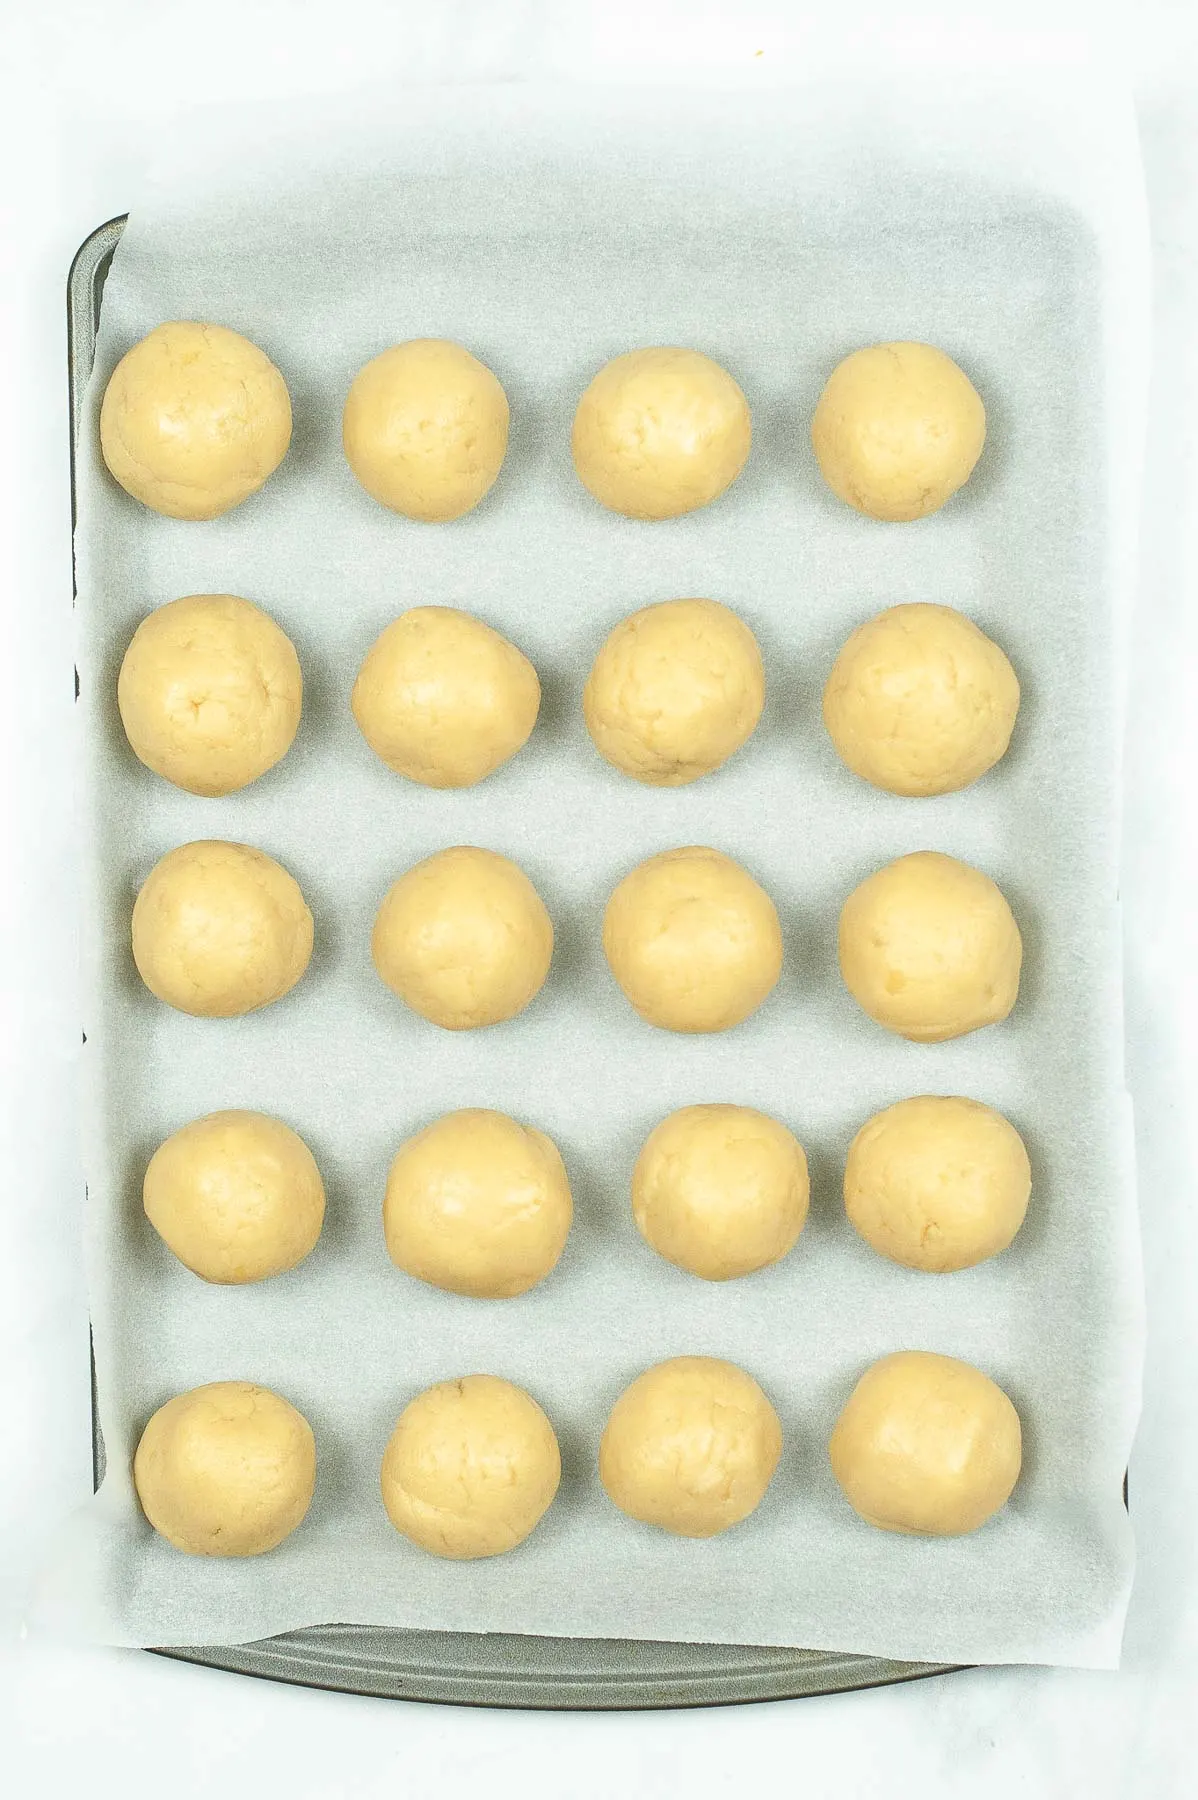
Divide your cake into 20 sections. Use your hands to roll each section into a round ball.
Place your cake pops on a sheet pan or plate, and place in the freezer for 15 minutes. This really helps make the perfect cake pops!!

While your cake pops are in the freezer, place all of your candy melts in a microwaveable medium-sized bowl. Microwave in 30 second increments, until completely melted.
Remove the cake pops from the freezer. Dip your cake pop stick into the candy melt, then into the cake pop. This is key for getting the cake pops to not fall off the stick!
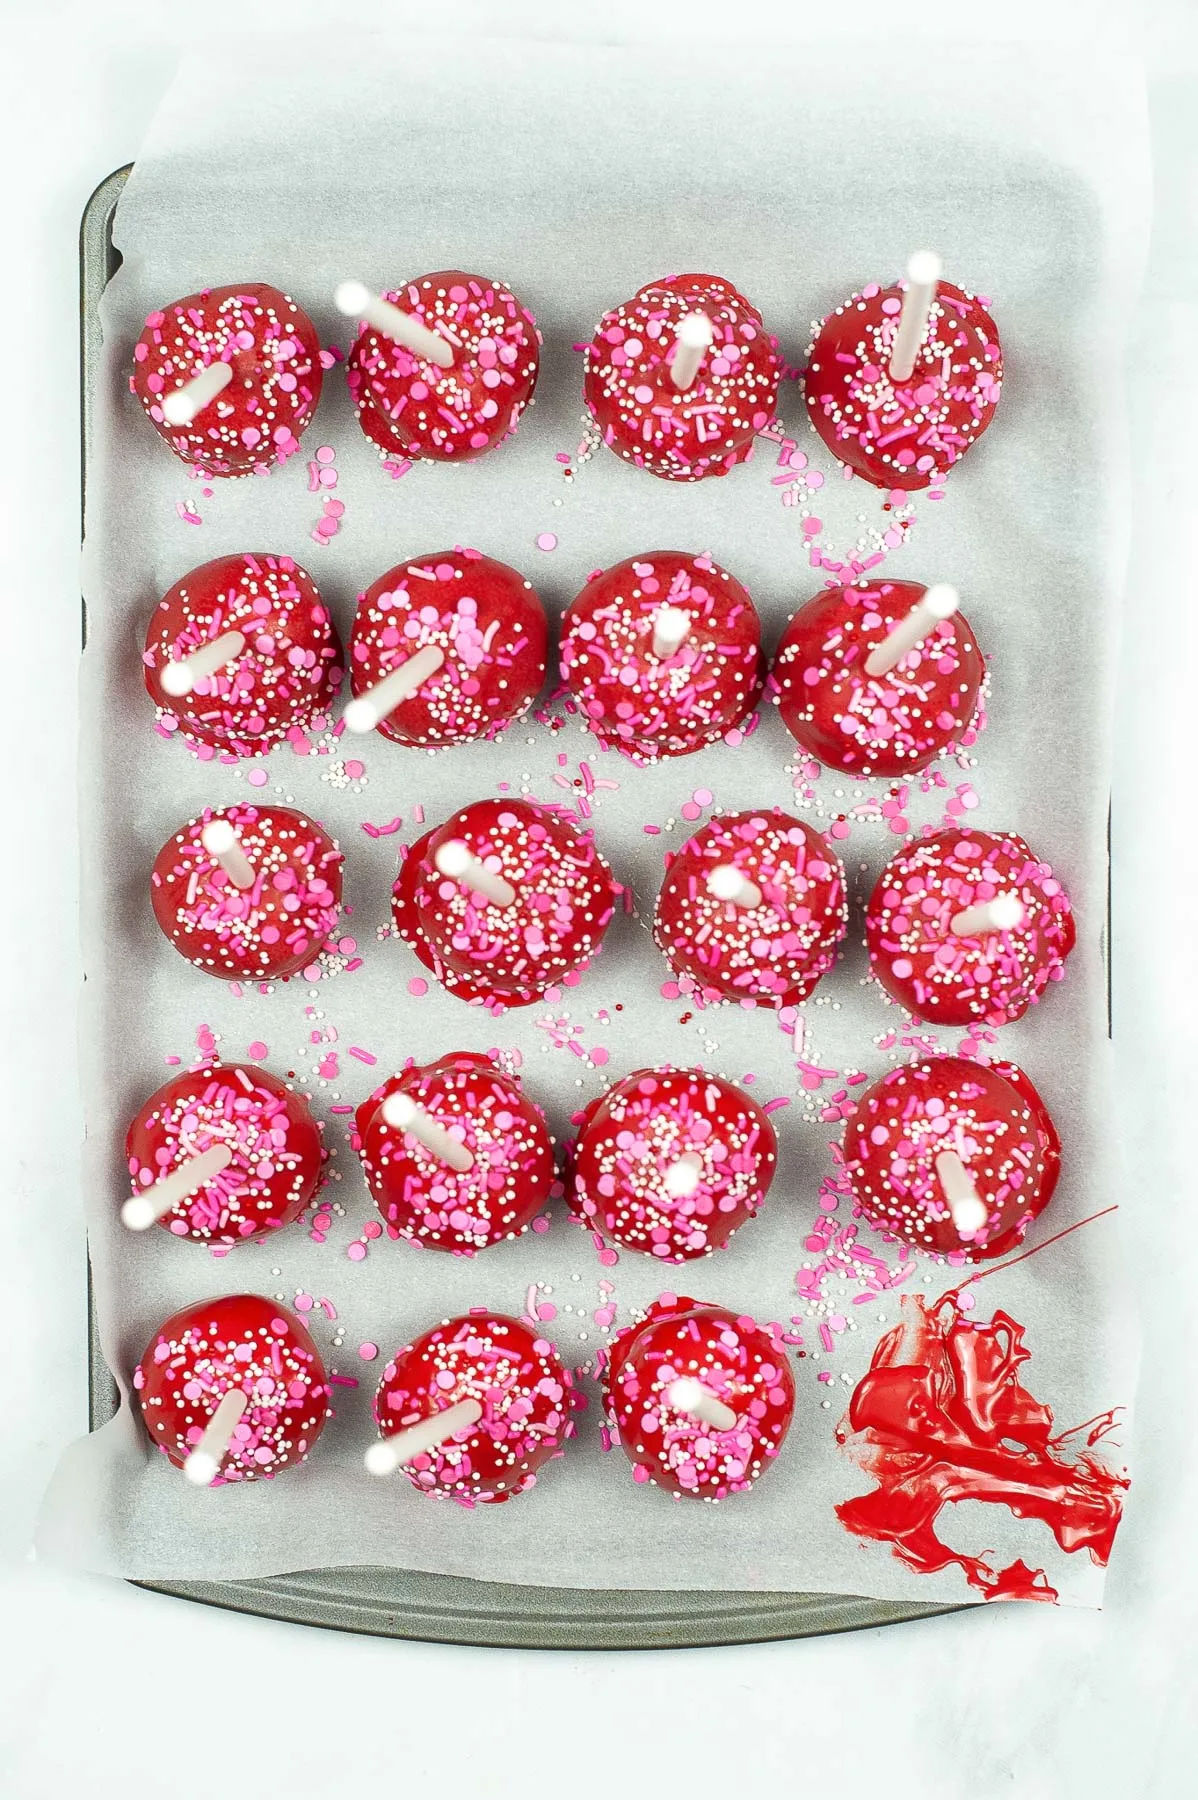
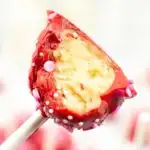
Now dip your cake pop into the candy melt. Coat the cake pop completely with the red candy melts. Tap the stick gently on the edge of the bowl, removing any excess dripping candy from the cake pop to create a smooth finish.
Place the cake pop on parchment paper (or read below for option 2 for drying the cake pops!). Immediately add your sprinkles before the chocolate dries.

You have two options for drying the cake pops:
1) Set them down on a sheet of wax paper, parchment paper, or a silicone baking mat. Make sure to add your sprinkles before the candy dries!
Or....
2) Flip them upside down and place them on a drying rack to dry. Make sure to add your sprinkles before the candy dries!
The drying rack method is definitely a little fancier and a good plan if you plan on gifting these in little treat bags.
The cake pops taste just as good if they dry on parchment paper! If you decide to go the fancy-pants route, then I would definitely recommend drying the cake pops on a drying rack and then serving them on a different display stand (like I linked to above). This way you don't get candy melt drippings or sprinkles all over your display stand. And keep in mind that the drying rack has holes at the bottom so you won't be able to pick up the cake pops all at once, you'll have to move them over one by one!!
Either way you decide to make and serve these cake pops will be just perfect!! If you end up making these, please take a picture and tag me on INSTAGRAM or FACEBOOK. You can find me at @babaganoshblog on both. I love seeing your creations!
Other fun desserts you will love:
- 4-ingredient red velvet cookies
- Red velvet mug cakes for two
- Twix hot chocolate bombs - you can absolutely make hot chocolate bombs with white chocolate candy melts and pink marshmallows inside!
- Almond joy hot chocolate bombs
- Healthy pink cottage cheese dessert
- Perfect oatmeal craisin cookies
If you enjoyed this recipe, let me know with a comment and a star rating below. And don't forget to share it on Facebook and save it on Pinterest for later!

Valentine's Day Cake Pops
Ingredients
- ½ boxed cake - cooked according to directions and cooled
- 2 tablespoon cream cheese frosting
- 12 oz red candy melts
- sprinkles: red, pink, white - your choice!
Special equipment
- Cake pop sticks (lollipop sticks)
Instructions
- Crumble up the cake in a large bowl. Add the ream cheese frosting. Mix well with a hand mixer, a strong spoon, or a stand mixer until a uniform dough forms.
- Divide your cake into 20 sections. Use your hands to roll each section into a round ball.
- Place your cake pops on a sheet pan or plate, and place in the freezer for 15 minutes. This really helps make the perfect cake pops!!
- While your cake pops are in the freezer, place all of your candy melts in a microwaveable medium-sized bowl. Microwave in 30 second increments, until completely melted.
- Remove the cake pops from the freezer. Dip your cake ball stick into the candy melt, then into the cake pop. This is key for getting the cake pops to not fall off the stick!
- Now dip your cake pop into the candy melt. Coat the cake pop completely with the red candy melts. Tap the stick gently on the edge of the bowl, removing any excess dripping candy from the cake pop to create a smooth finish.
- Place the cake pop on parchment paper or a silicone baking mat (or read below note below!). Immediately add your sprinkles before the chocolate dries. Enjoy!!
Notes
- Get cake pop sticks here
- Make these a gift! Wrap up you cute cake pops in individual treat bags with colorful bows!
- For gifting, dry the cake pops on a drying rack upside down. Make sure to add your sprinkles before the outside dries!
The nutritional information displayed is an estimate and not to be used as dietary or nutritional advice. Consult a nutritionist or dietician for nutritional info based on the exact ingredients you use.