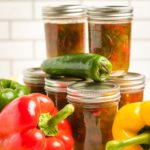
Sweet and Spicy Pepper Jelly
This sweet and spicy jelly cooks in about 5 minutes and is such a versatile condiment! Your choice whether you want a quick refrigerated pepper jelly, or if you want to can this pepper jelly to use throughout the year and give as gifts. Be sure to read the notes for cooking tips and for canning tips.
Servings: 8 jars
Calories: 307kcal
Cost: $1.50/jar
Equipment
- Medium/large saucepan for cooking the pepper jelly
- Plastic gloves for removing seeds from jalapeños (trust me on this!! The heat burns your nailbeds and cuticles so badly!)
- 8 8-oz canning jars (or any heat-safe jar if you don't plan on canning)
- Canning tools (if you plan on canning)
- Large canning pot (if you plan on canning)
Ingredients
- 2 large red bell peppers
- 2 large green bell peppers (or you can use any combination of bell pepper colors, I just recommend using at least 2 colors to make a more festive pepper jelly)
- 5 jalapeño peppers (or more if you prefer it extra hot - you can always taste and add more at the end)
- 3 cups granulated sugar
- 1 box pectin for low sugar recipes (such as from Sure Jell)
- ½ cup apple cider vinegar
- ½ cup water
Instructions
Pepper jelly recipe
- Remove all seeds from the bell peppers and the jalapeños. Wear plastic gloves when doing this because the jalapeños can burn your skin. Rinse out any remaining seeds under cold water.
- Chop all peppers into very small pieces. You can use a food processor but be careful to not over-chop. You don't want a pepper puree.
- Place chopped peppers into your pot. Add ¼ cup of the granulated sugar and the pectin to the peppers and stir. Add in the water and vinegar.
- Bring to a full rolling boil, then add in the remaining sugar and stir. Return to a boil and boil for one minute, or until you like the consistency of your jelly.
- If you don't plan on canning, allow the jelly to cool a little before transferring to a glass jar. Keep refrigerated for up to 1 week.
Canning instructions (read the notes for timing tips)
- Sterilize the jars: Place your jar and lids in a canning pot with a rack in the bottom. If you don't have a canning pot, you can place a metal rack or steaming rack on the bottom of a large pot. It is important to have something for the jars to sit on so they don't get too hot on the bottom and burst. Cover the jars with hot water, allowing the jars to fill with the water—the water should come to about 1 inch over the top of the jars. Cover the pot, bring to a simmer, and heat for 10 minutes.
- Remove jars using tongs, making sure the water is drained out of them, and place them right side up. Do not touch the jars with your hands so you don't introduce bacteria, but allow the heat from the jars to evaporate the extra water so the jars are dry. Ideally, you want to time this so you are removing the jars from the pot at about the same time as the jelly is ready to porin so the jars will be still hot. Otherwise, the hot jelly can cause the jars to break if they are too cold.
- Ladle the jelly into the prepared jars (I love the funnel from this canning set). Clean off any jelly that may have gotten onto the rims. Place the lid discs onto the jars and screw on the jar rings. Place the jars into a large pot of hot water with a metal rack. You can use the water you used to sterilize jars, but you may have to remove some of the water before placing jars in because the jars are not empty anymore. Once the jars are in the water, add any additional water needed to cover the jars by at least an inch.
- Cover the pot with a lid and bring to a boil. Boil for 10 minutes, then remove jars to cool on your counter overnight to thicken. Can be stored in a cool, dry place for up to one year.
Notes
This pepper jelly can be stored in a jar in the fridge for up to ~1 week, no canning required. If you want to make canned pepper jelly, it will keep in a cool dark place for about 1 year.
You can scale the recipe down if making refrigerator jelly, unless you have friends and family you want to give this away to who would be able to enjoy it right away.
Nutritional info is estimated per jar. Each jar will have about 6-8 servings, so about 40-50 calories per serving.
Canning tips: You'll want to time the sterilizing step to be done about the same time that the jelly is cooked. The jelly recipe needs only about 5 minutes to cook, so I would prepare all the ingredients, then start the sterilizing step, then make the pepper jelly itself. You can keep 1-2 jars as refrigerator jelly and can 6-7 jars.
Nutrition
Calories: 307kcal | Carbohydrates: 75g | Fat: 1g | Sodium: 2mg | Potassium: 12mg | Sugar: 75g | Calcium: 2mg | Iron: 1mg