

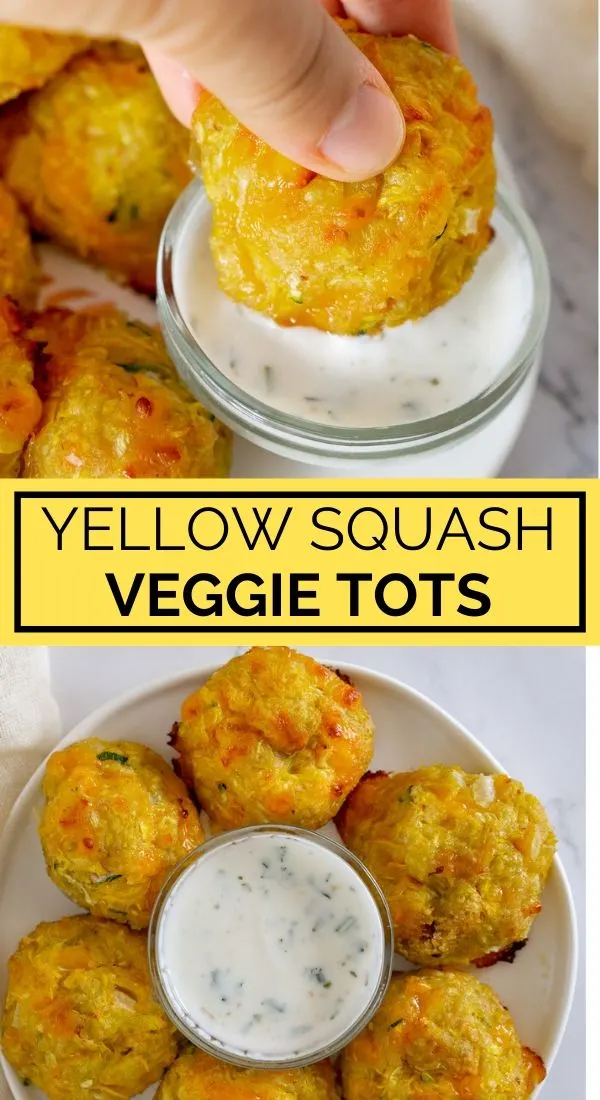
Looking for a fun summer squash recipe? Make these Yellow Squash Tots - perfect little veggie tots that use up a lot of yellow squash (or zucchini!).
They're so tasty, snackable, and are a great way to eat more veggies.

Jump to:
- Yellow squash tots
- Dips for vegetable tots
- How to make yellow squash tots
- How to freeze vegetable tots / storing leftover squash tots
- Reheating leftover vegetable tots or frozen vegetable tots
- Looking for other fun vegetable recipes?
- Looking for other recipes to use zucchini or summer squash?
- Yellow Squash Tots
- Reviews
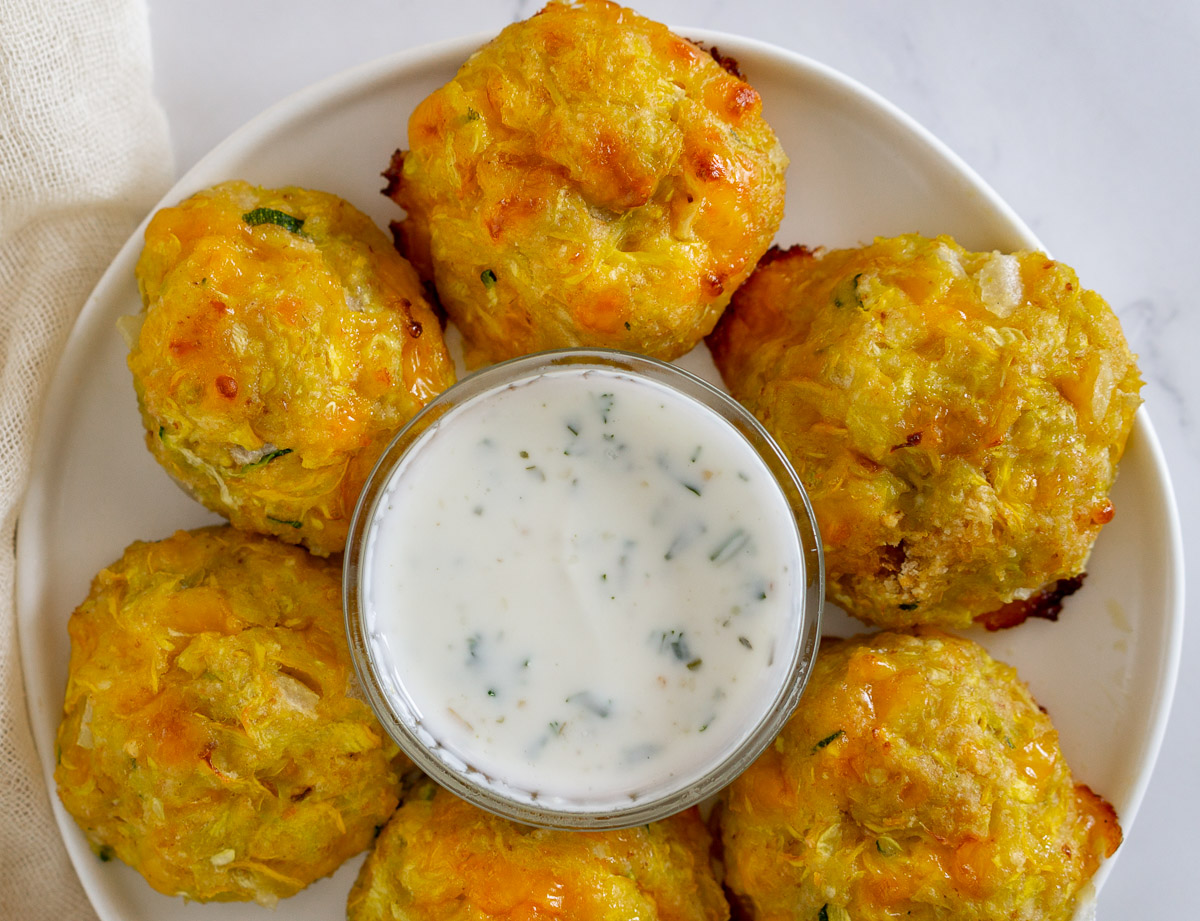
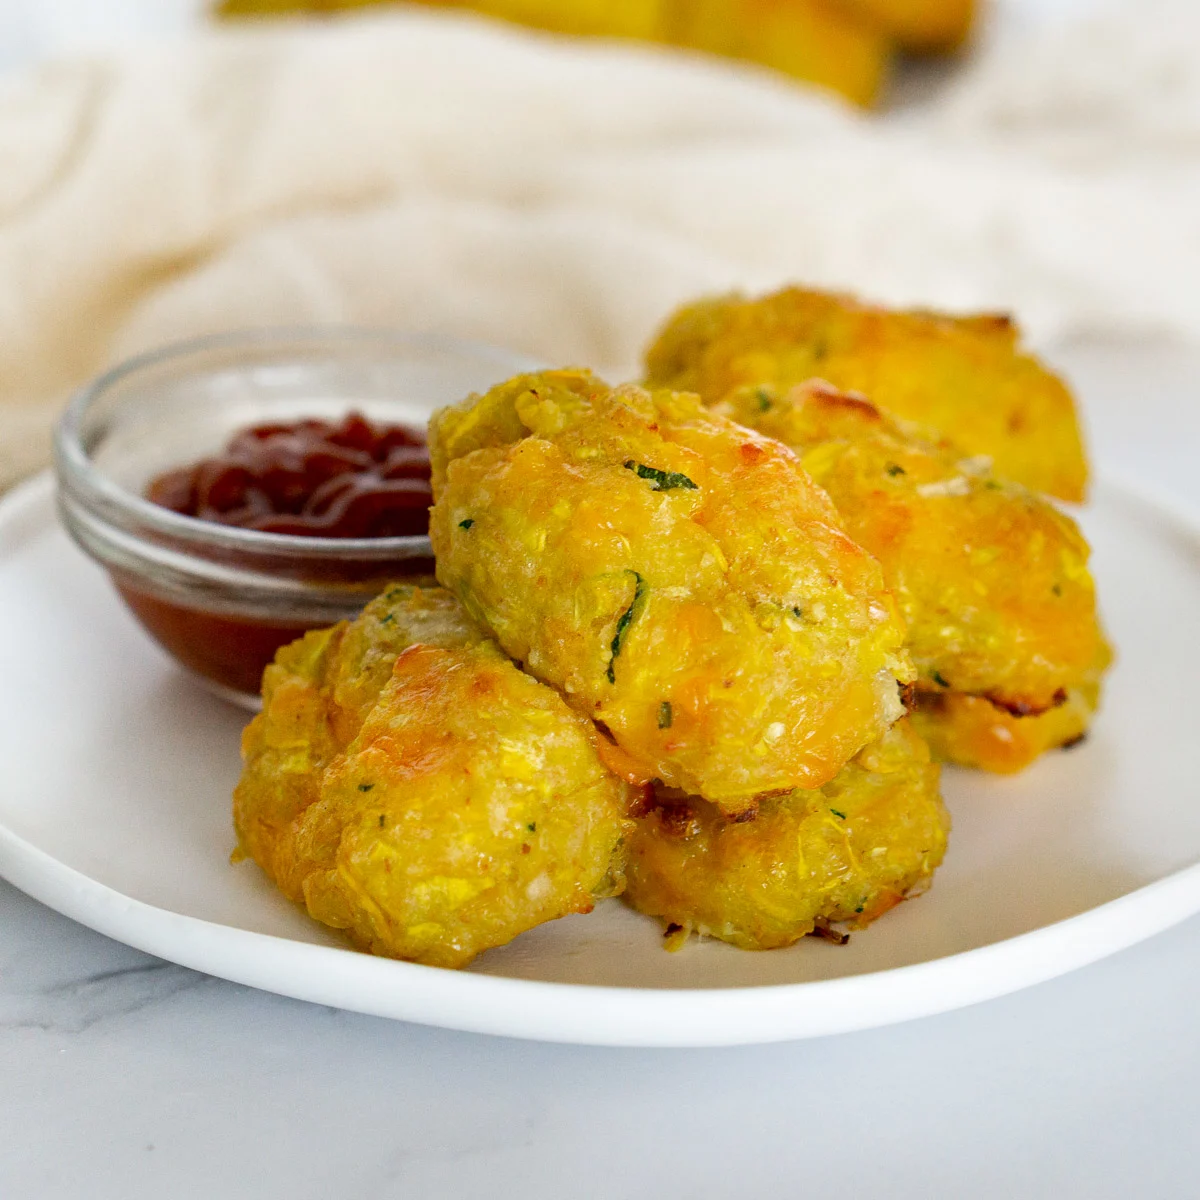
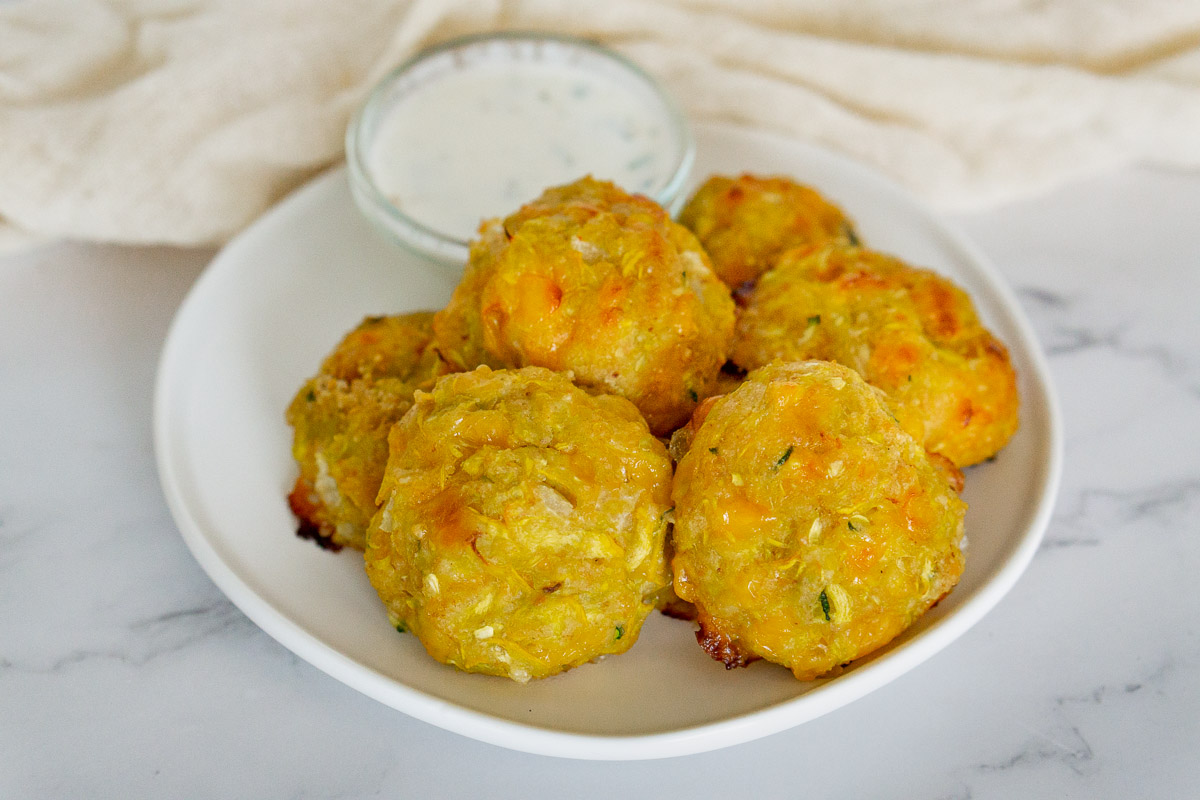
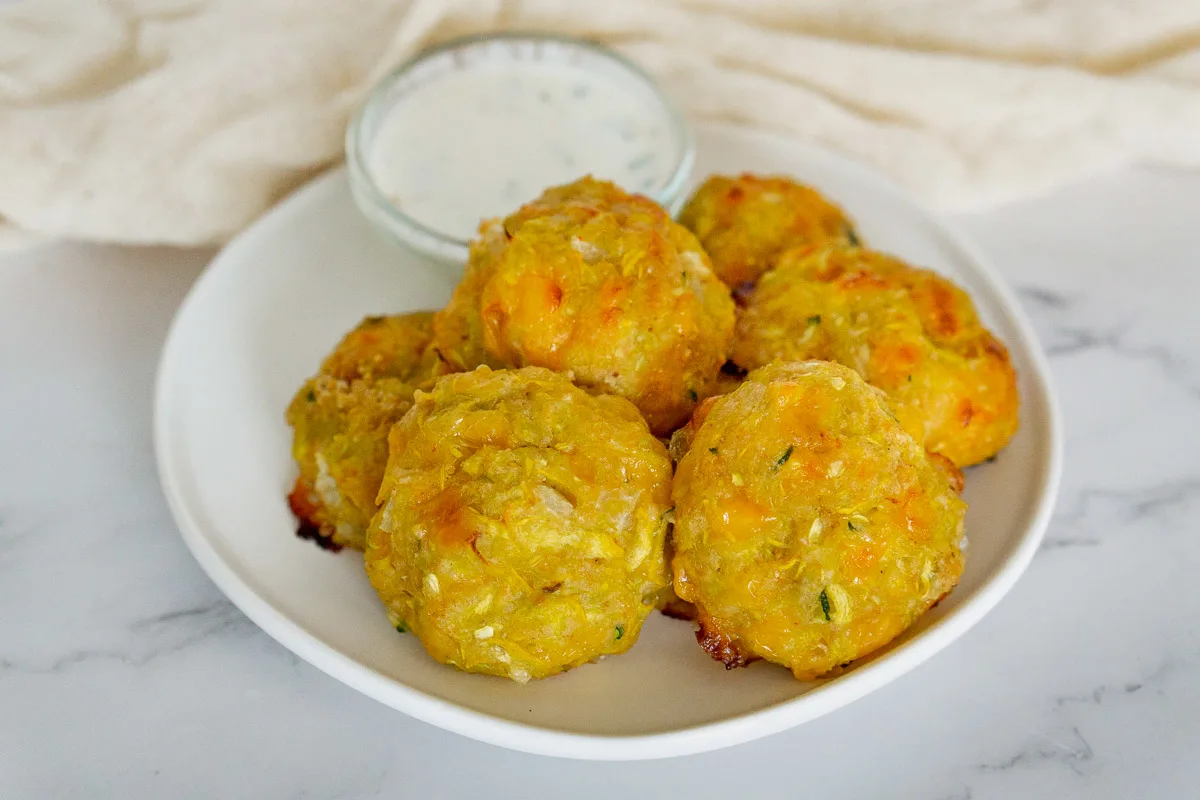
Yellow squash tots
These yellow squash tots are a GREAT way to use up summer squash (or I should say "a GRATE way" because I love me some food puns!). I used yellow squash for this recipe, but you can use zucchini or a combination of these two summer squash - they are totally interchangeable in this recipe.
I just like how the bright yellow tots look, and there is no green to scare my veggie-fearing toddler. 🙂
These squash tots are a GREAT way to get more vegetables into your day because they are fun to eat. They're so snacky and addicting. Kind of like my Zucchini Fritters, which are so easy to make.
Kids love them. Adults love them.
Everyone who tries this recipes loves them.
Serve these veggie tots as a snack or as a side dish (amazing with burgers, such as this venison burger, turkey burger, pork burger, chicken burger, or vegetarian chickpea and sweet potato burger).
I bet you will eat a LOT more squash in vegetable tot form than if you were to eat them in a salad or other vegetable side dish.

Although if you're looking for a good summer squash salad, I got a couple here:
- Grilled vegetable salad
- Zucchini and carrot spiralized salad with lemon garlic dressing and feta
- Zucchini and carrot spiralized salad with sesame ginger dressing (vegan!)
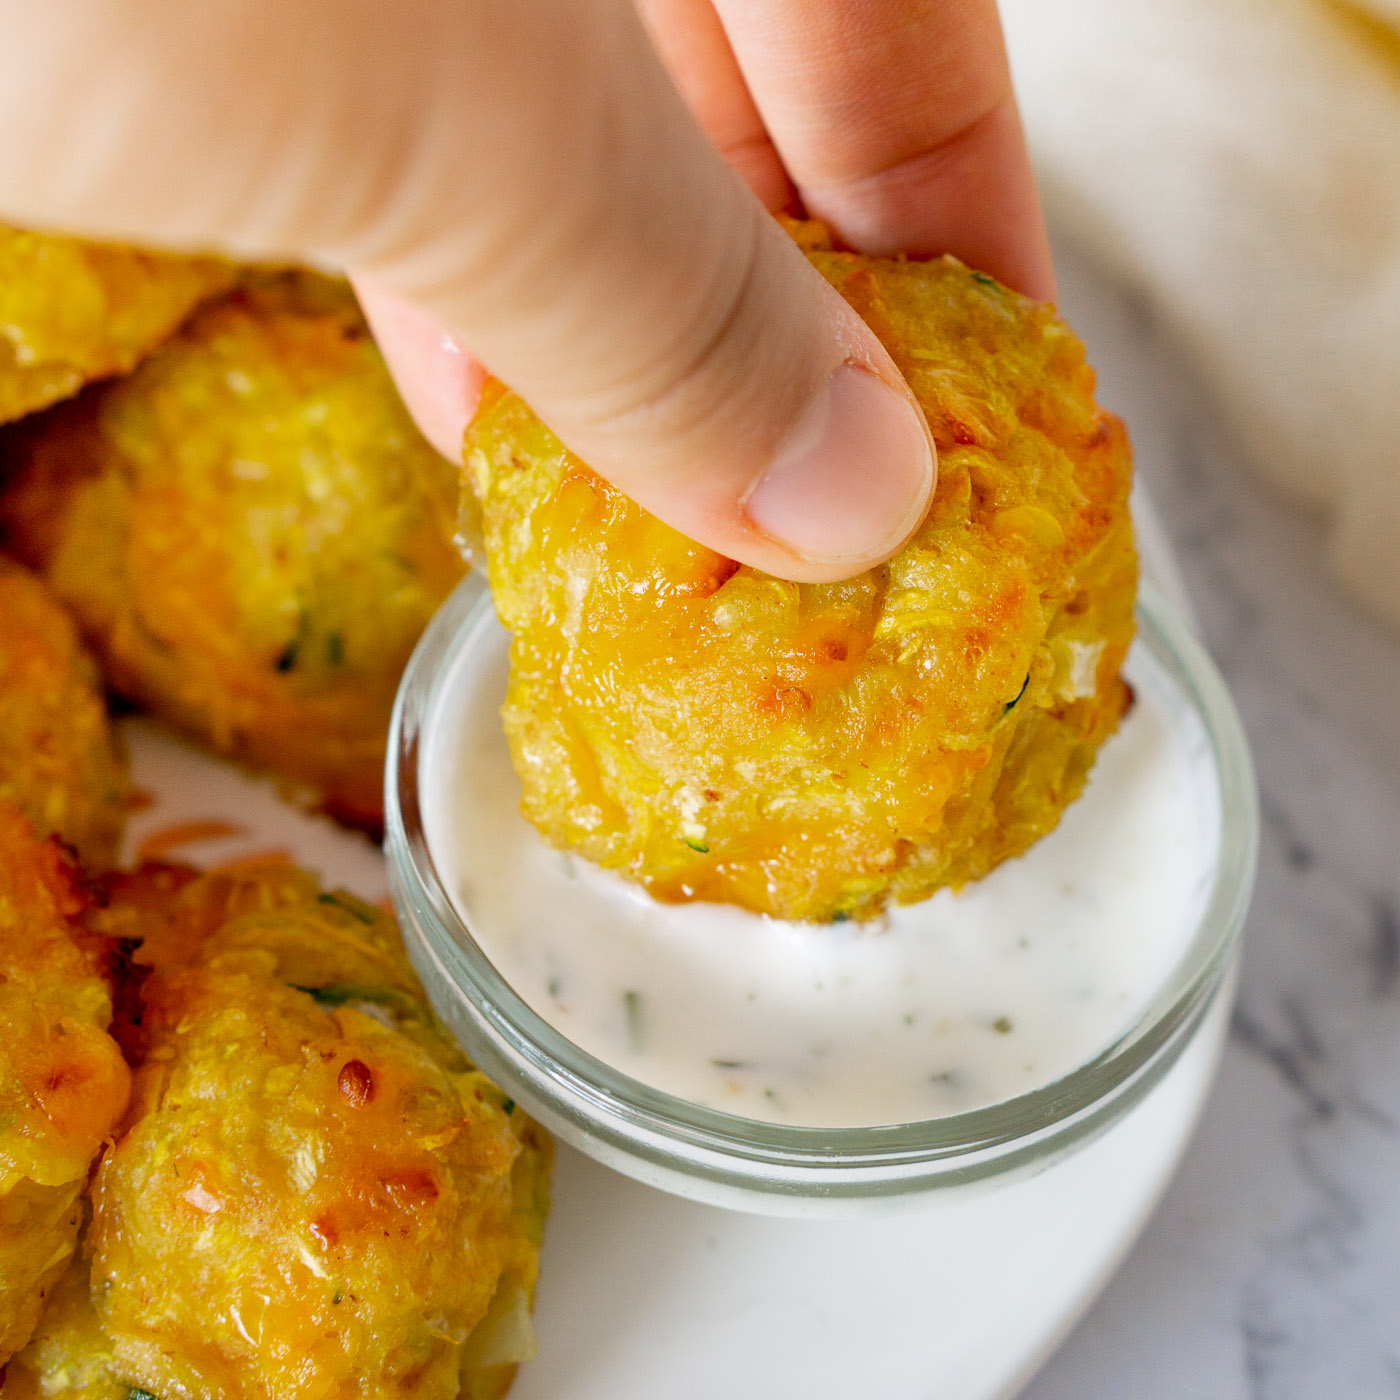
Dips for vegetable tots
The best way to serve these squash tots is with a variety of dips. Try one of these (or all of these):
- Ketchup
- Ranch
- Sriracha ketchup (ketchup with a squeeze of sriracha, to taste)
- Lemony garlic Greek yogurt dip (recipe is in the recipe card below!)

Related recipe: Zucchini Bread Pancakes
How to make yellow squash tots
Follow these easy steps with pictures here, or scroll down to the recipe card to read the full recipe or watch the video.
Start by grating your yellow squash on a fine grater. I like using this box grater to do this because it's sturdy and much easier than a flat grater.
If you are lucky enough to have a food processor that has a grater plate, USE IT!
You can also use zucchini here, if you prefer. Either whole zucchini, or just the middle parts leftover from a ribboned zucchini recipe, such as this raw zucchini carpaccio.
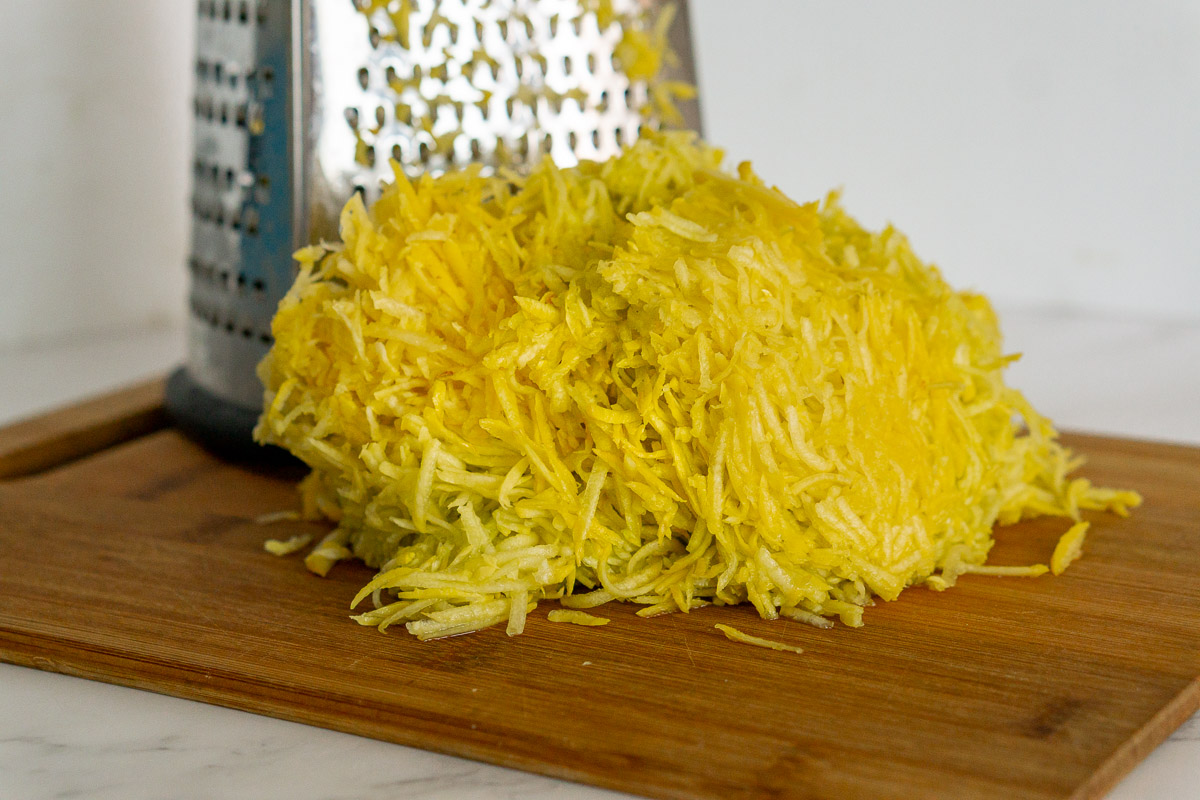

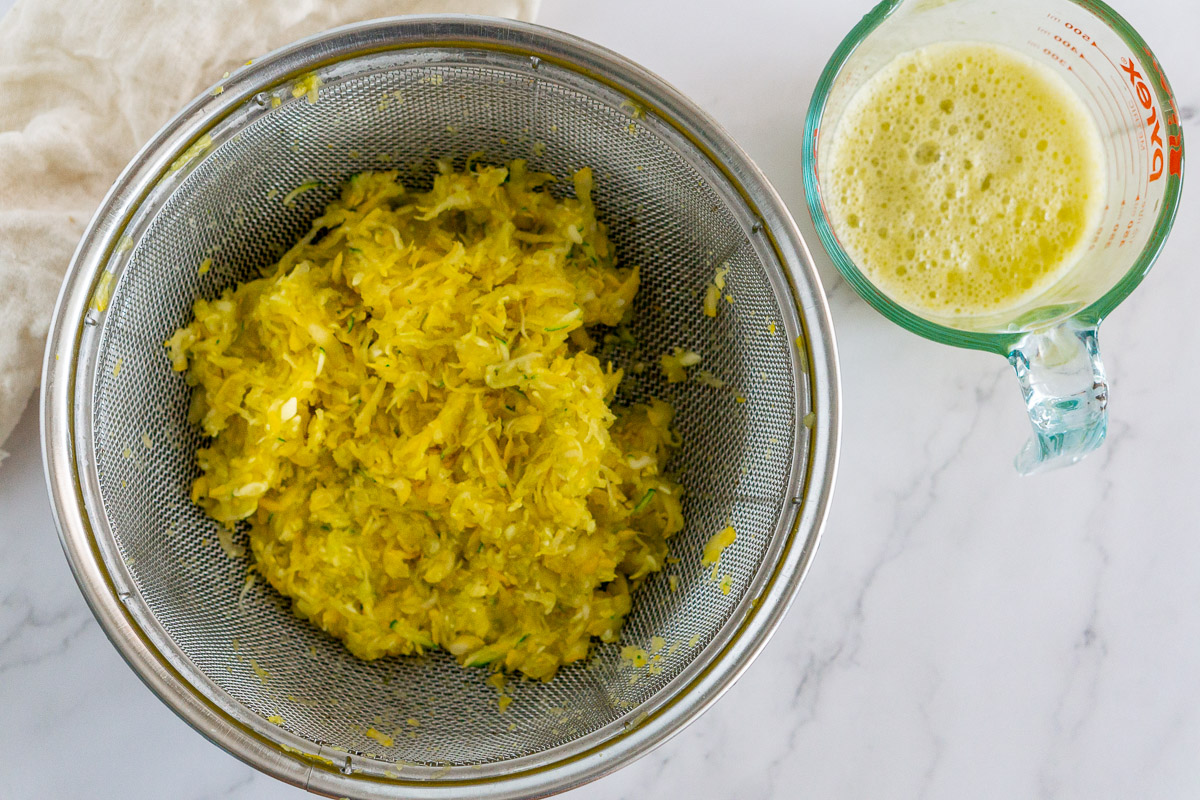
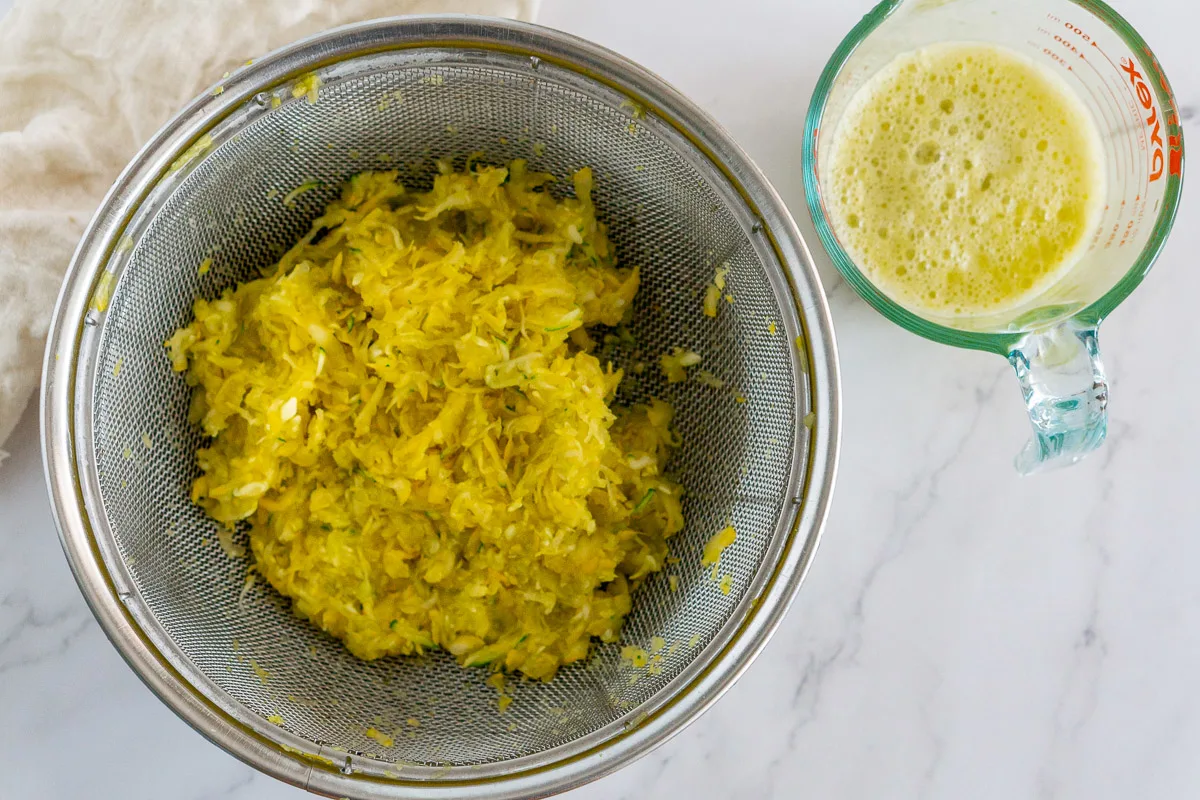
Then season the grated squash with salt and let it sit in a large colander while you get the rest of the ingredients ready.
After a few minutes, use your hands to squeeze out as much liquid as you can from the grated squash. You should have about a cup of liquid for every pound of squash you use (if you're doubling this recipe and using 2 lbs or more).
Alternatively, you can place all the grated squash in a clean kitchen towel or a cheesecloth and roll the grated squash into a ball and squeeze it to get all the excess liquid out. I find this to be a little easier but less effective because it's hard to get the water out from the center of the grated squash.
DO NOT SKIP THIS STEP - it's crucial for getting the tots to stick together and come out nice and crispy around the edges.
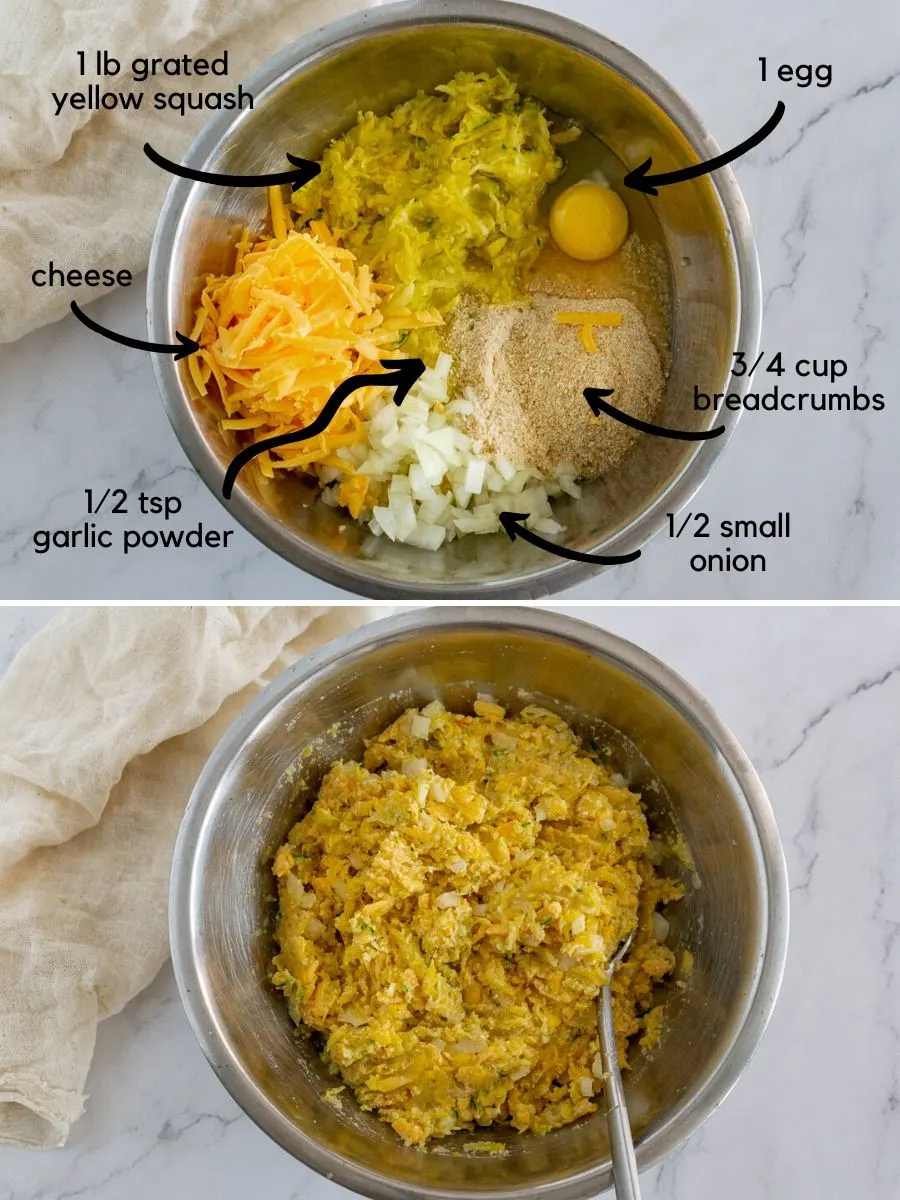
Then combine the grated squash and the rest of the ingredients in a bowl and mix well.

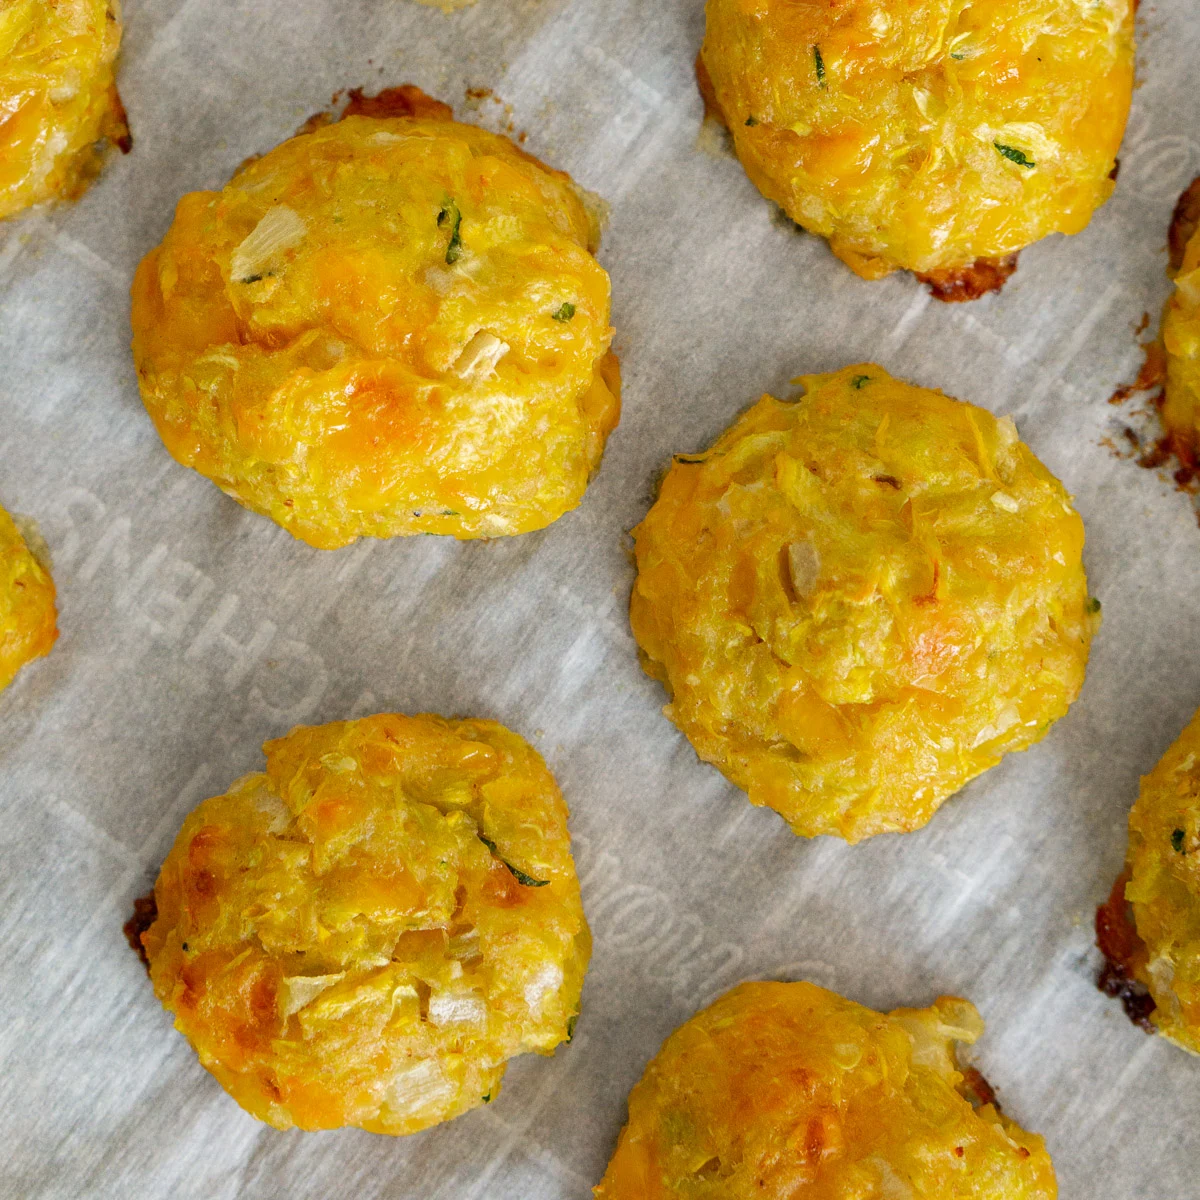
Use your hands to form small little tots - either round balls or longer tot-shaped pieces. (Pro tip: dip your hands into a bowl of cold water in between the tots to prevent them from sticking to your hands)


Place on a large baking sheet that is lined with parchment paper (or greased, but the parchment paper is the less messy way to go!)


Bake at 400F for 25 minutes. Prepare the yogurt sauce (or whatever other dips you want) while the tots are baking.
Enjoy!

More summer squash recipes: Zucchini Tortilla Wraps
How to freeze vegetable tots / storing leftover squash tots
This recipe can totally be doubled (or tripled) if you want to make a small project out of it. You can store leftover squash tots in a sealed container in the fridge for up to 3-4 days.
Or you can freeze them! The best way to do this is to arrange them on a large plate, cutting board, or baking sheet and place them in the freezer to freeze individually. Then transfer them all to a freezer-safe zip lock bag or container. Doing it this way is an extra stop, but it will prevent the squash tots from sticking together while freezing together.
More squash recipes to try: Air Fryer Delicata Squash
Reheating leftover vegetable tots or frozen vegetable tots
Reheat frozen or refrigerated tots in the oven. Preheat the oven to 350F and place on a baking sheet. Refrigerated squash tots will only need about 5 minutes of baking time. Frozen squash tots will need about 6-10 minutes to reheat all the way through.
I wouldn't use a microwave to reheat these because they don't crisp back up in the microwave.
I LOVE my Cuisinart Toaster Oven / Air Fryer combo because it reheats things like tots and French fries really well without having to preheat anything. Plus it's a toaster and an air fryer in one!
Love how colorful this yellow squash is?? Check out this list of yellow foods!
Looking for other fun vegetable recipes?
Looking for other recipes to use zucchini or summer squash?
- Balsamic grilled summer squash salad
- Sheet pan shrimp and vegetable pasta
- Veggie loaded creamy chicken fajita pasta
- Bacon roasted vegetables
- Roasted vegetable fettuccine
If you end up making these yellow squash tots, please take a picture and tag me on Instagram or Facebook. You can find me at @babaganoshblog on both. I love seeing your creations!
If you enjoyed this recipe, let me know with a comment and a star rating below. And don't forget to share it on Facebook and save it on Pinterest for later!


Yellow Squash Tots
Ingredients
- 3 small yellow squashes or zucchini - about 1-1.5 lb yellow squash
- 1 egg
- 4 oz grated cheddar cheese - or other meltable cheese (about ½ cup grated)
- ¾ cup breadcrumbs
- ½ medium onion - finely chopped
- ½ teaspoon garlic powder
- ½ teaspoon salt
- Ground black pepper - to taste
- Optional: 2 tablespoons - ¼ cup finely minced parsley leaves
- ⅓ cup unsweetened Greek yogurt
- 2 teaspoon lemon juice - (from about ½ lemon, or to taste - see notes)
- 1 teaspoon finely minced parsley - (or dill, or ½ teaspoon dried parsley or dill)
- ¼ teaspoon garlic powder - (or use 1 small clove garlic, minced)
- ¼ teaspoon salt - or to taste
- ¼ teaspoon pepper - or to taste
Instructions
- Preheat oven to 400F. Line a large baking sheet with parchment paper, or grease the baking sheet with olive oil.
- Grate the squash on a fine grater or use a food processor. Add ½ teaspoon salt, and mix it together. Put the grated squash in a colander (or use a cheesecloth, see notes). Let sit while you prepare the rest of the ingredients.
- Use your hands to squeeze all the extra liquid from the grated squash in the colander. You should have about 1 cup of liquid for every pound of squash you use. Discard the liquid.
- Combine all the tot ingredients in a large bowl and mix well. The mixture should be sticky and wet, like a thick paste. If it is too wet, add extra breadcrumbs. Form small tots with your hands (about 1.5-2 tablespoons squash mixture per tot). Tip: dip your hands into a bowl of cold water in between every few tots - this will help keep the squash mixture from sticking to your hands!
- Arrange the tots on the parchment-lined baking sheet. Bake at 400F for 25 minutes, or until golden on top and lightly browned on the bottom. Allow to rest 5 minutes before removing them from the baking sheet - this will help prevent them from sticking.
- In a small bowl combine all the ingredients for the yogurt sauce while the tots are baking. Serve as a dip for the warm tots!
Video
Notes
- If you want to use a cheesecloth instead of a colander to squeeze out the extra liquid from the tots, place the grated squash in a large doubled cheesecloth and make a tight ball. Squeeze the cheesecloth with your hands and twist it tighter to get the liquid out.
- I recommend the colander method over the cheesecloth because you can really get in there with your hands and squeeze more liquid out.
- If you want a summer squash recipe that does not straining or squeezing, try these Zucchini Fritters.
- A few readers said the yogurt dip is a little too sour for them when using 2 teaspoons lemon juice. I always make it with 2-3 teaspoons lemon juice and I love it, but please start with less than 1 teaspoon and adjust to taste!
- Nutrition facts assume 4 servings and will vary based on actual ingredients/brands used.
Nutrition
The nutritional information displayed is an estimate and not to be used as dietary or nutritional advice. Consult a nutritionist or dietician for nutritional info based on the exact ingredients you use.
PMH
Friday 10th of November 2023
I always have to edit recipes to be gluten free. I made these twice simply omitting breadcrumbs and my wife said they need to be a staple in our diet. So they worked without the breadcrumbs!
But… I bet they are even better with them, and I recently discovered that I don’t react to Einkorn wheat. I will have my daughters make some bread and reserve a bit for Einkorn breadcrumbs. My mouth is watering just thinking about it.
Donna
Friday 25th of August 2023
It’s not a quick dish to make (because of the prep to get the extra liquid out) but the efforts are so worth it!! Delicious 😘
Nancy
Thursday 24th of August 2023
Do you think I could make them in a muffin pan
Kate
Friday 25th of August 2023
I think that should work! Just keep them small or they won't cook through on the inside. I would do a mini muffin tin. If using a standard one, I would just put a 1-inch layer of squash tot at the bottom and not fill it up. And make sure to grease it really well or put parchment paper or muffin liners so the tots don't stick to the pan.
Meg
Thursday 17th of August 2023
Could you make these in the air fryer if so how long would you cook them
Fatima
Wednesday 27th of September 2023
@Meg, I just use the air fryer . It came out very good .
Fatima
Wednesday 27th of September 2023
@Meg,
Kate
Friday 18th of August 2023
Hi, I haven't tried that myself, but a reader commented this for the recipe, which might be a good starting point: "We did them in the air fryer. When the tray was pretty full, ours were done in 10 minutes at 400 degrees in air fry mode. The second batch only had six, and they were done in about 6-7 minutes." I would personally start with maybe 375F just to make sure they cook through without burning, and each air fryer cooks differently, so keep an eye on the tots so they don't burn. Let me know how it turns out!
Samantha
Sunday 13th of August 2023
I think I didn't squeeze the water out enough. I had to cook them extra long to get the middle to not be so wet.
I ended up flipping them and squishing them down to finish cooking them.
Delicious once done.
Kate
Wednesday 16th of August 2023
Glad you ended up liking them! Good thinking on the fly to flip and squish them down to finish cooking.